

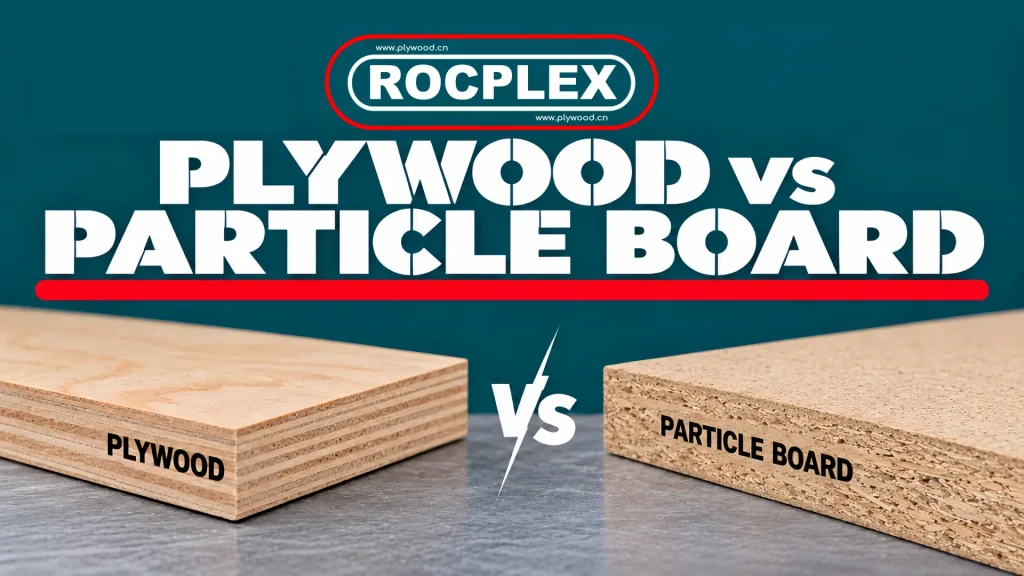
Plywood vs particle board is a more useful comparison once the sheet has been cut, edged, drilled and joined. Plywood can suit shelves and joints that face high loads. Particleboard can suit the low-cost, repeat work of making finished furniture panels. In either case, the right choice depends on the board grade, the fittings and the intended use.
Consider two cabinet sides, both specified at 18 mm. Each needs hinge screws, shelf holes, a back groove and a finished front edge. Their sizes may match on the drawing. Yet each cut and hole places a new demand on the board. The buyer needs a part that works in use and a process that can make it well, batch after batch.
Define What the Trial Is Allowed to Change
Before you order samples, decide whether you need a new board for an existing design or a new furniture design. Each task calls for a different trial.
For a direct swap, keep the part drawing, fittings and agreed process settings the same. Then test whether the new board works within those limits. For a new design, you can change the screw, shelf support or edge finish. The aim is to find a full board-and-fitting design that meets the furniture brief at a fair cost.
| Trial | What stays fixed | What the result tells you |
|---|---|---|
| Direct material swap | Part sizes, fittings, finish and agreed process settings | Whether the board suits the current design and process |
| Furniture design trial | Intended use, appearance and agreed test targets | Whether each board and joint design meets the furniture brief |
| Batch cost review | Approved finished-part design and quality limits | The cost of making usable parts at the required volume |
For example, a centre support may help a shelf meet its sag limit. However, the result now belongs to that supported shelf. Include the added part and the work needed to fit it.
Keep these trials separate. A board that fails a direct swap may still work in a revised design. Likewise, a new design that passes with a different screw does not prove that the original line can use it as it stands.
Plywood vs Particle Board at the Cut Edge
Plywood uses glued veneers, usually with the grain crossing between layers. Particleboard uses glued wood particles. Many furniture boards also have distinct face and core layers. EGGER’s P2 product page, for example, describes fine outer layers and a middle layer that serves the core.
Once you cut the sheet, you can see what the face finish hides. In plywood, look for veneer gaps, overlaps and poor bonds where a groove or screw will sit. In particleboard, check for loose particles, chipped edges and the surface to which the edge glue must bond.
Use the saw or router that will make the parts. Also use the planned feed speed and normal tool condition. A hand-picked display sample tells you little about a back groove cut close to the edge on the factory line.
Take parts from several places across the sheet. Then check the thin strip beside the back groove and the board around the hinge cup. Record which flaws need repair and which lead to scrap.
An exposed plywood edge can be part of the design, so give it a clear visual grade. If both boards need edge banding, compare the finished joints, including glue coverage and trim quality.
Density Has a Location Inside the Board
Average density tells you the mass in a given volume of board. A screw grips a small area at a set depth. Those are different ways of looking at the same sheet.
Particleboard can have a density profile through its thickness. As a result, the material near the face may differ from the material at the centre of an edge. The Forest Products Laboratory review of particleboard processing drew attention to these density gradients. Published in 1977, it explains a basic issue in board science; it is not a test report for a current product.
For buying decisions, this means that density alone cannot prove how well a hinge plate, edge screw or shelf pin will hold. Ask for results that match the board and fitting you plan to use.
Plywood also has local differences. A screw can meet grain running in several directions, a glue line or a gap in the core. A good-looking face does not reveal every part of that path.
Therefore, record the fixing point in a plywood vs particle board trial. A screw in the face, one in the edge and a fitting in a recess need their own checks.
Plywood vs Particle Board at the Screw Joint
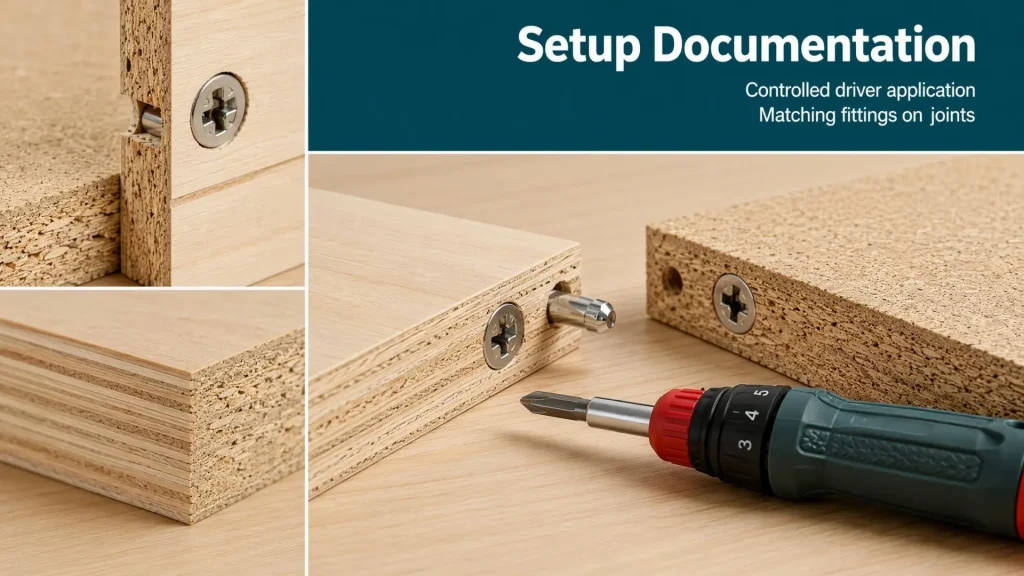
A screw must pull the fitting firmly into place. Yet further turning can damage the board before the driver stops. The gap between firm seating and damage is the joint’s useful tightening window.
The 2021 USDA Wood Handbook chapter on fastenings warns that excess tightening can strip threads in particleboard. It also treats screw pull-out from the face and edge as separate cases. Its formulas apply to stated screw sizes and thread depths. They do not set one safe driver torque for all furniture boards.
Set up the trial with the actual screw, pilot hole, fitting and board. Record hole size and depth, edge distance and driver setting. Then inspect how the fitting sits. Look at failed joints too, because a crushed face and stripped threads call for different fixes.
The door also applies a moment to the hinge joint. The screws, fitting and nearby board help resist that turning effect. So a straight pull-out test on one screw cannot describe the whole hinge joint.
If users will take the furniture apart, also test the agreed sequence of removal and refitting. A fresh hole and a reused hole start in different states. Choose the joint to suit the way the furniture will be built, moved and used.
A Shelf Carries Time as Well as Weight
A shelf may stay in one piece while sagging beyond an agreed limit. That is why bending strength and stiffness need separate checks. The USDA chapter on wood composite properties makes this distinction. Stiffness describes how much a part bends under load; strength relates to the stress the material can bear before failure.
For plywood, check the veneer layup and the grain direction along the shelf span. If you rotate a part to cut more pieces from a sheet, its bending response may change. Use figures for the actual board and thickness in either case.
Next, consider how long the load stays on the shelf. Creep is the extra movement that develops under a lasting load. The Wood Handbook chapter on mechanical properties explains this effect in wood, including the role of changes in heat and humidity. It does not give one creep factor for every furniture panel.
A plywood vs particle board shelf trial should therefore state the span, supports, load pattern and room conditions. Agree the sag limit and how to measure it. Then record the first movement, movement during the test and any bend left after the load comes off.
A short lab test can help you choose a board. However, a claim about years of use needs a sound link between the test and real service. Set clear pass limits for shelf sag, joint movement and appearance.
The Finish Changes the Part
A faced panel brings together a core, surface layers, glue and edge finish. Its final result depends on how those parts work together.
For example, the raw board may meet the supplier’s thickness tolerance. Yet the finished part may be too thick or thin for a fitting. Measure the part after facing where screw grip, recess depth or alignment depends on that size.
Large doors also need a flatness check. With high-pressure laminate, a moisture barrier and a balancing layer do different jobs. Formica’s guide to panel warping explains that paint, varnish or vinyl on the back does not balance a laminate face. So review both skins, the glue process and the conditions in which the parts are stored before bonding.
Edge banding helps protect the core from moisture. Check glue coverage, corners and trimmed joints as well. If a fitter cuts a new edge or drills a service hole later, agree how that exposed area will be treated.
In a plywood vs particle board trial, set the same visual brief and finished quality target. A clear-coated plywood edge and a melamine-faced, edge-banded board take different routes through the factory. Therefore, price each route with its own labour, finish materials and scrap allowance.
Plywood vs Particle Board in Humid Rooms
Damp air, splashes and a leaking pipe create different demands. State which of them the finished part must withstand.
BS EN 312:2010 defines P2 for interior fitments, including furniture, in dry conditions. It defines P3 for non-load-bearing use in humid conditions. Thus, P3 suits humid use, but it does not make a cabinet waterproof.
The term “non-load-bearing” also needs context. EN 312 separates furniture boards from grades for structural building parts. A shelf still carries its contents, so it needs a sound design and its own load checks. The standard’s public scope summary also states that the listed board values are not characteristic values for structural design calculations. They do not set a design load.
For plywood, the bond class concerns how well the glue resists moisture. The wood itself can still take up water. Therefore, name the panel build and the edge and surface protection needed for the job.
Next, trace where water could enter: a bare cutout, a screw hole, a damaged edge joint or a base against a damp floor. Check swelling, loose joints and any loss of function there.
For a sink cabinet, define the exposure first. Then inspect the sealed cutouts and joints on the finished cabinet. This links the board’s moisture grade to the details that must work in use.
Test the Furniture That Will Reach the Customer
A panel test and a furniture test answer different questions. EN 320:2011 covers axial screw withdrawal in particleboards and fibreboards. In plain terms, the screw is pulled along its axis. That can help you judge the board, but it does not reproduce every force in a hinge or drawer runner.
ISO 7170:2021 gives test methods for the strength, durability and stability of fully built storage units. However, its public abstract says that the methods do not set the acceptance criteria. It refers to suggested loads, cycles and forces based on the furniture’s use.
Before you order the test, agree the furniture design, fittings, intended use and pass limits. A claim that a board is “tested to ISO 7170” does not identify the whole item tested or its result.
Use parts made by the planned factory process for the plywood vs particle board trial. Include the finish, edge treatment, fittings and build settings. If transport or customer assembly forms part of the brief, define that sequence too.
Finally, keep the report with the exact tested design. If you later change the board, screw or part size, check whether the earlier result still applies.
Count Finished Parts Before Comparing Prices
The useful cost unit is a finished part that meets the agreed brief. Sheet price is just one input.
A board that cuts well may need less repair or create less scrap. Another may suit a cheaper finish route or a better cutting plan. However, include those gains only when a trial batch gives you a sound basis for them.
Count the usable parts from that batch. Then record cutting waste, machining faults, edge repairs, finish faults and failed joints on separate lines. Divide the board and process costs across the parts that pass. This shows how much of the lower sheet price reaches the finished furniture.
Weight also needs a check against the actual part. Both plywood and particleboard cover a range of densities. Ask for the mass of the named board or finished part. Then include fittings, finish and packing when you assess handling and freight.
Finally, count any design change that helped the trial pass. Extra shelf supports, a new fitting or another sealing step add their own costs.
We recommend comparing quotes against the same furniture brief, quality limits and delivery scope. As a result, the plywood vs particle board price review stays linked to the parts the factory can supply.
Freeze the Details That Make the Joint Work
Once a board and joint pass the agreed checks, record what made them work. A broad label such as “18 mm furniture board” leaves too much room for a later change in supply.
For plywood, name the panel build, thickness tolerance, face grade, bond class and grain direction that matters to the part. For particleboard, name the grade, thickness tolerance, surface finish and board values needed for the job.
Also link the board spec to the cutting, drilling and build records. Mark key holes and recesses on the drawing. Where they affect the joint, record the tools, pilot holes, glue and driver settings too.
A trial that passes only with one unusually careful setting needs more work. Normal output needs a useful range that allows for the agreed board limits and normal process changes. Therefore, test the parts across that range before you approve the setup.
We recommend agreeing how to review changes in board source, core, fittings or finish. Then state which records can support a change and which part or furniture tests need repeating.
This gives the plywood vs particle board spec lasting value. When the price or supply source changes, the buyer has a clear way to keep the proven furniture design working.
Plywood vs Particle Board for Your Next Production Run
We supply ROCPLEX plywood and ROCPLEX particleboard for furniture and interior use. Our discussion starts with the part you need to make.
For your next plywood vs particle board enquiry, send the part drawing, finished thickness, face and edge needs, fitting details and likely moisture exposure. Also include quantities and any furniture-test requirements agreed with your customer.
Contact us to discuss the board spec and quote scope. Choose the board and process that can deliver the agreed furniture result, run after run.
🌐 www.plywood.cn
✉️ roc@plywood.cn
📱 WhatsApp / Call: +86 15152013388
Post time: Nov-02-2026